Almost all data scientist start out their career with a project folder like this.
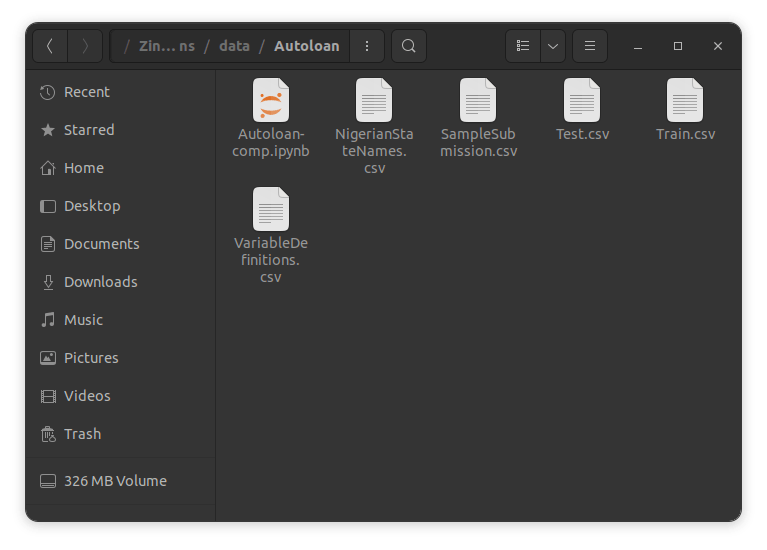
A single folder containing a single notebook (or maybe two) containing all their codes i.e for data ingestion, data transformation and preprocessing, model building, model inference and also model deployment (it’s possible to deploy models from colab these days) until they move into a proper work setting and now, most of their colleagues don’t use notebooks, what on earth are notebooks even? So they have to split their notebook(s) into web scraping/ data ingestion script, data transformation and deployment scripts, model building script, model inference script and model deployment script. Now they also have to write tests for all their scripts, so test scripts too. They have to keep track of all their raw data files and the different preprocessed data files. They can’t perform inference on the go, so they have to save their different models too plus the different charts (ROC values, data distribution) they have to share with their boss. Within a short duration of time, they’ve moved to a folder like this.
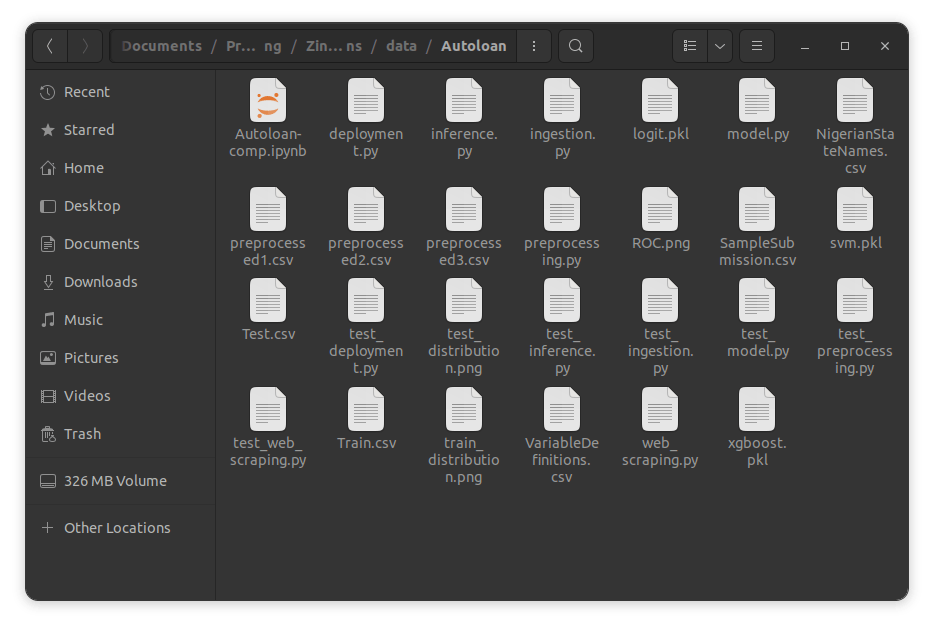
The chances however are, there’s a high probability of you messing up something and that’s something you definitely want to avoid. This means you need a proper project folder structure, but that is something you don’t want to spend a lot of your time worrying about because you’re yet even to start the project. In this tutorial, I’ll show you how you can set up a proper folder structure for your data science project with minimal effort.
Tools we'll be using
- Poetry
- Datasist
- COokiecutter
Create a virtual environment
First, let’s create a virtual environment to isolate this new project from the existing dependencies on our PC. This helps to ensure the reproducibility of our code and prevent conflicting versions of any dependency or package that may break our code. To do that, let’s create a new folder where our project will be and the virtual environment will be inside.
mkdir new-project
we created a new folder named it new-project.
python3 - m venv new-project/venv
Next, we created a virtual environment inside this folder
cd new-project
Then we opened the folder
ls
We list the constituents of the folder
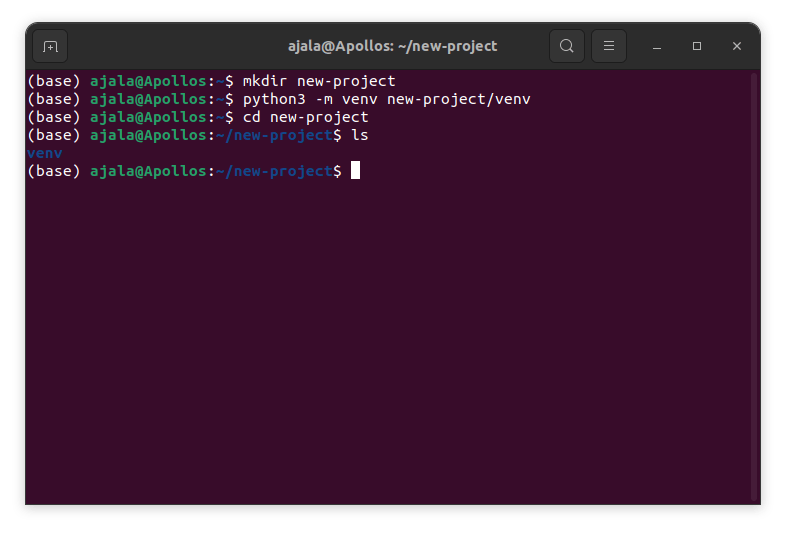
Next, we will activate the virtual environment
source venv/bin/activate
 The virtual environment can later be deactivated using
deactivate
Poetry
The first tool we’ll be considering is poetry. Poetry is a dependency management tool for declaring, managing and installing dependencies for python projects. Poetry makes it to download the necessary dependencies and packages you may need for your project. It also makes it easy for you to package and publish yours. While we are not looking at building or packaging packages usually as data scientists, poetry provides a lot of other tools that may be beneficial to us. You can read more about poetry here.
To download poetry
curl -sSL https://install.python-poetry.org | python3 -
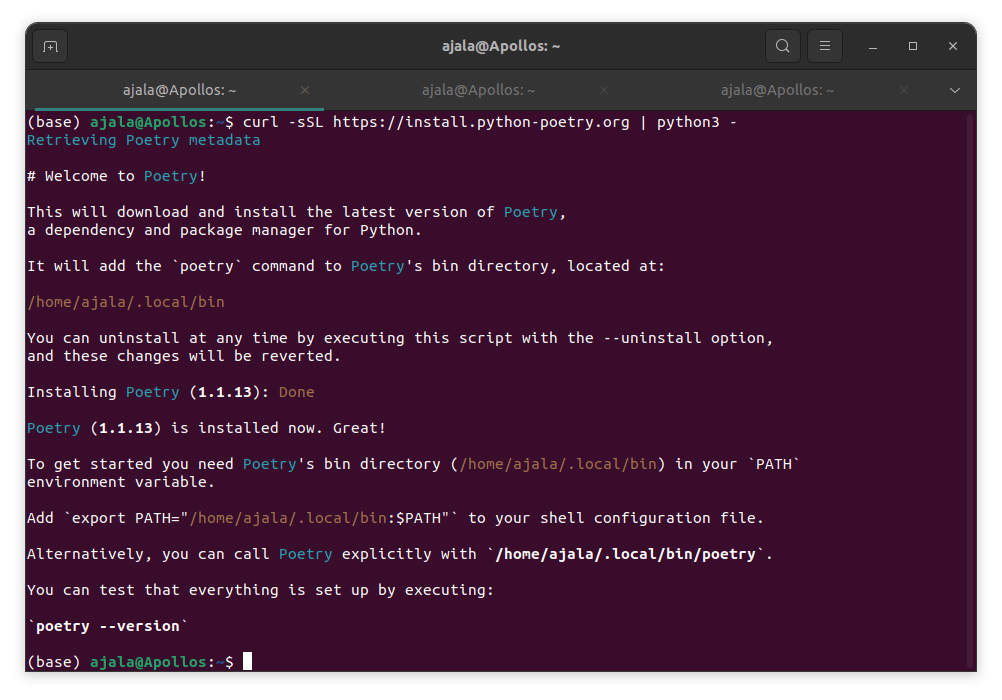 You should have a result similar to that, after that add it to the path and check the version
export PATH=”/home/yourusername/.local/bin/;$PATH”
poetry –version
You should also have a result similar to this.

It is also possible to use pip to install poetry
pip install --user poetry
That will produce a similar result to the method explained above.
To create a new project folder in poetry,
poetry new new-project
we’ll check the folder structure of the new project using
tree new-project
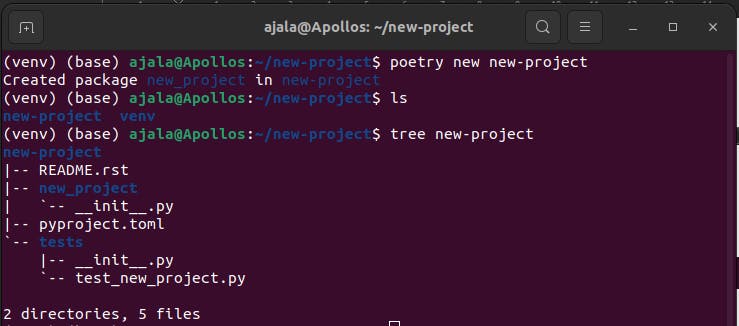 Poetry creates a new-project folder for us inside the existing new-project folder. The structure of the project includes 2 directories:
- new-project: This will house all our source codes except the test scripts.
- tests: This will house all the test scripts we will write for our project.
2 additional files:
- README.rst: This contains a readme description for your project.
- pyproject.toml: This will help you orchestrate your project and the dependencies you’ll be using. It will look something like this.
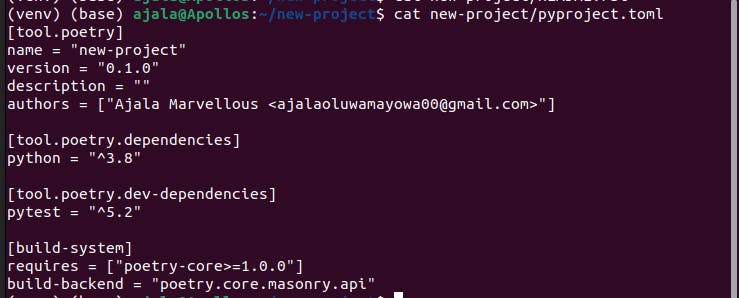
Remark
Because poetry was not designed specifically with data scientists in mind, it means the folder will still need some adjustment to completely serve the need of data scientists as you will have to create new folders for your data, model outputs and others. In all, it’s a major improvement to the initial structure.
Datasist
Datasist is actually a tool (library) built for data scientists for easy data analysis, visualisation, exploration and modelling. It was designed to extend the functionality of python data analysis tools like pandas and was built to provide a fast and quick abstraction interface for repetitive functions, codes and techniques in data science to one-line functions.
One important feature of datasist for creating project folder structure is the startproject. Because datasist was created specifically with data scientists in mind, thus the folder structure is more directed towards the needs of data scientists. Because our focus for this tutorial is setting up a project folder structure, our use of datasist will be limited to startproject only. You can read more about datasist here.
To get started with datasist, we’ll need to download datasist using the python package manager
pip install datasist
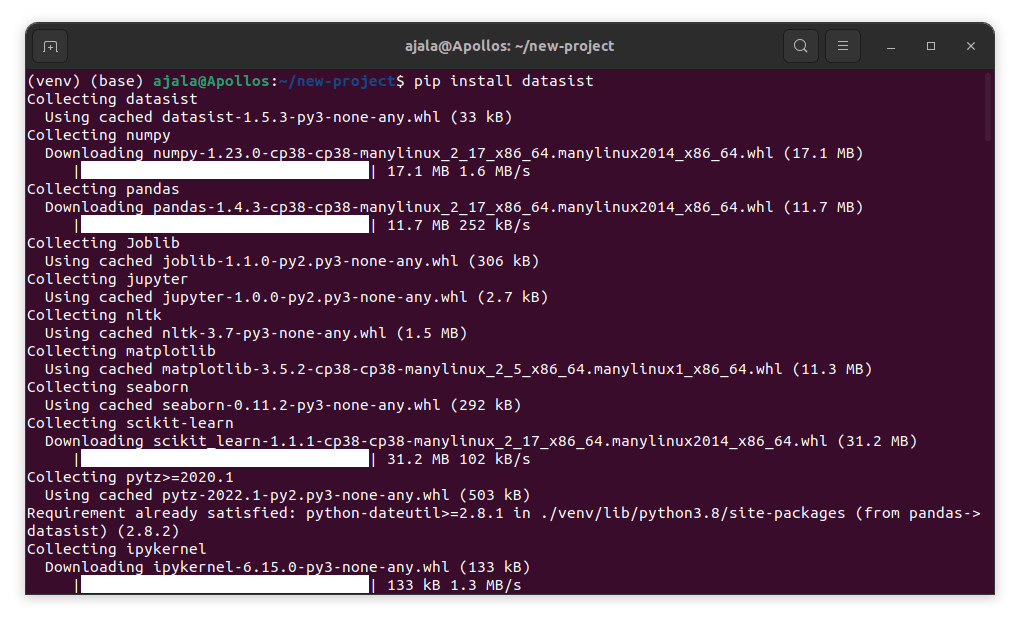 It should start downloading and look something like mine. Once it is done, it should display
 Next, we can ask datasist to create a new project folder for us using startproject
startproject new-project
and let’s check the project structure
tree new-project
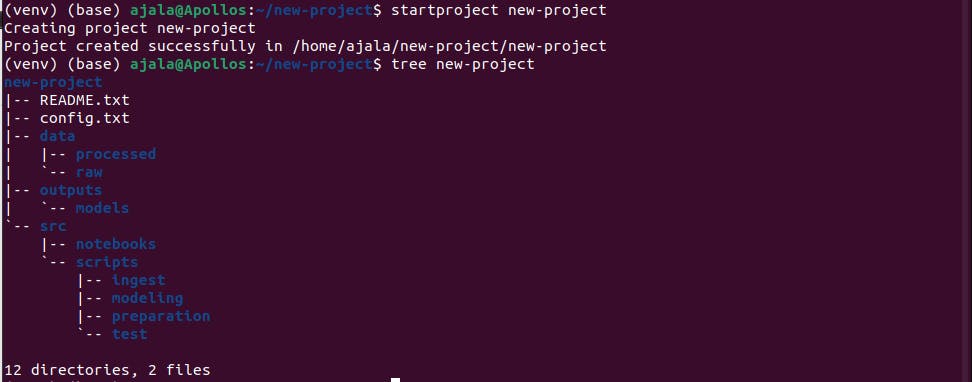
And this produces a folder structure that is more designed for data scientists and data science projects. A breakdown of the structure includes two files:
- README.txt: This is a readme file containing the brief of our project and every information people need to know about it.
- config.txt: this is an automatic configuration file generated by datasist that contains the configuration of the whole project with the different path addresses.

The folder also contains 3 subfolders namely:
- data: This will contain all the data files we’ll be using for our project and it is further subdivided into:
- raw: This folder will contain all the raw data files from our web scraping or data collation process. These are the data files that are still untouched and unprocessed.
- processed: This will folder contain our dataset after it has been processed and transformed. This prevents the mixing up of processed data with the raw data in the raw folder.
Output: This folder will contain all the outputs from our project (visualisations, models, parameters etc). This folder ensures that they are all kept safe and untampered with. It contains a subfolder:
- models: This folder will host all the models for our project that we will need to save.
src: This will contain all the scripts and notebooks for our project. It is further divided into:
- notebooks: This will contain all the notebooks for experimentation. Usually, because notebooks are kept out and not committed to git, we can easily specify for git to ignore all the contents of this folder.
- scripts: This will contain all the actual scripts we’ll use for our project. It is further divided into 4 subfolders;
- ingest: This will contain the scripts for data ingestion and loading. Also, our web scraping scripts can be placed in this folder.
- modeling: This will contain all scripts for building our machine learning models
- preparation: This will contain the scripts for our data preparation and transformation.
- test: This will contain all our tests for all the other scripts in our project.
Remark
Because datasist is a package designed for data scientists, the folder structure by startproject is designed to meet the basic needs of data scientists and get them running as soon as possible, thus the folder structure will serve the basic needs for any machine learning project.
Cookiecutter
The last tool we’ll be looking at is cookiecutter. Cookiecutter is actually a package designed to create a project folder structure following an existing template. It is therefore designed for all developers to create folders structure to meet their specific needs using existing templates and in the absence of one, they can create a new template to meet their needs.
To get started, we’ll need to install cookiecutter
pip install cookiecutter
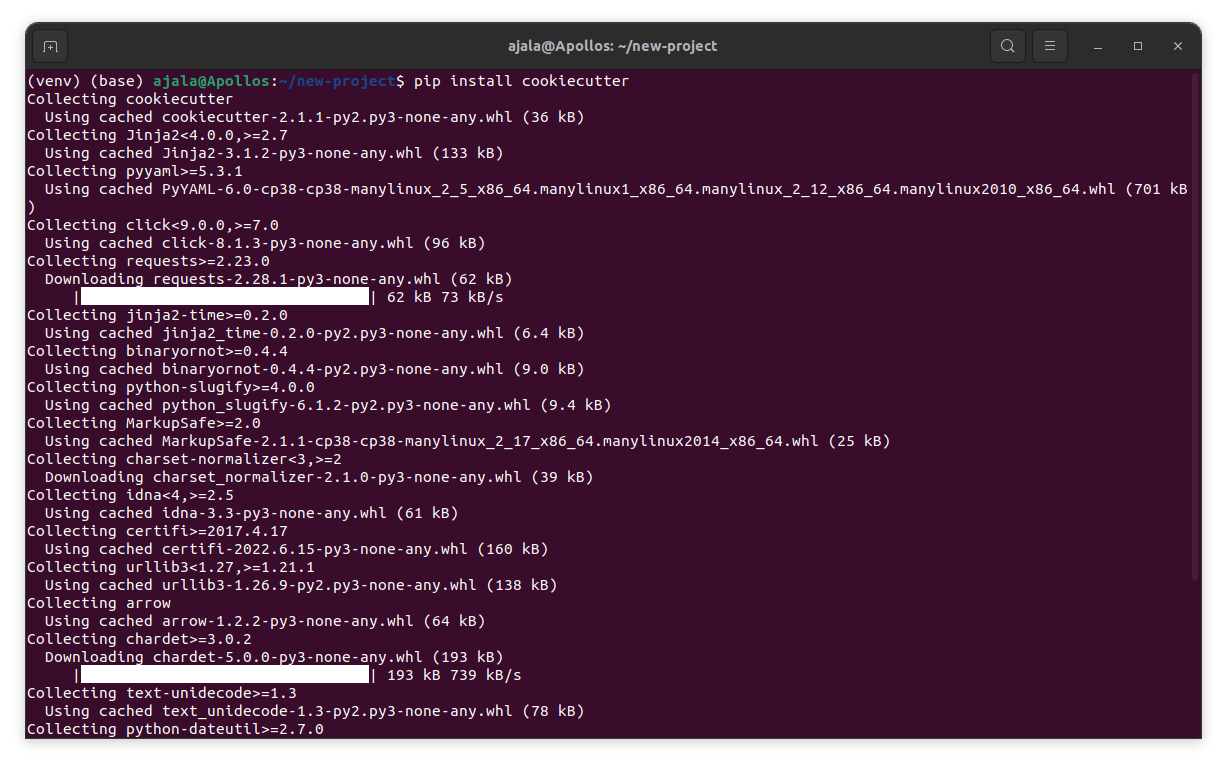 You should have a result similar to mine showing cookiecutter and its dependencies being downloaded.
Next, we need to find a cookiecutter template that suits our specific need, this refers to a project folder template designed to be used with cookiecutter for our specific need (you can search on GitHub for ‘cookiecutter templates’ and we’ll see numerous templates that exist that we can choose one from). For our case, we’ll use the cookiecutter-data-science template that is available on GitHub (you can check it here)
cookiecutter https://www.github.com/drivendata/cookiecutter-data-science
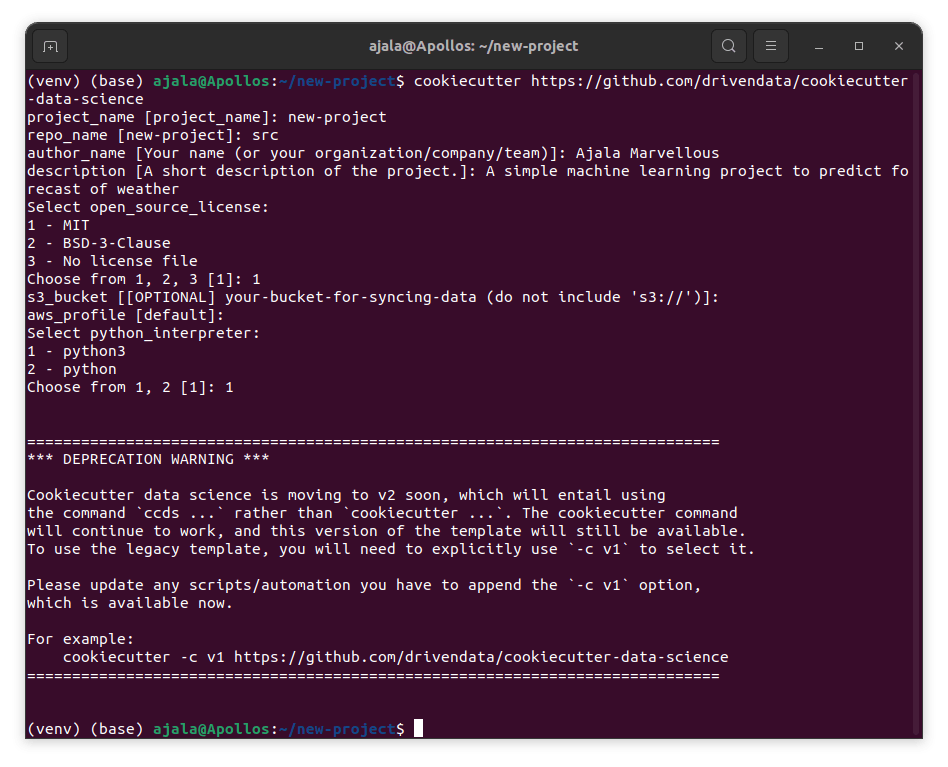 It will ask us to enter the name of our project, the name of the repository, the author’s name, a description of the project, an open-source licence, s3-bucket (if we have our data in the cloud which is optional), aws_profile (which is also optional) and python interpreter and after this will create a new folder structure for our project.
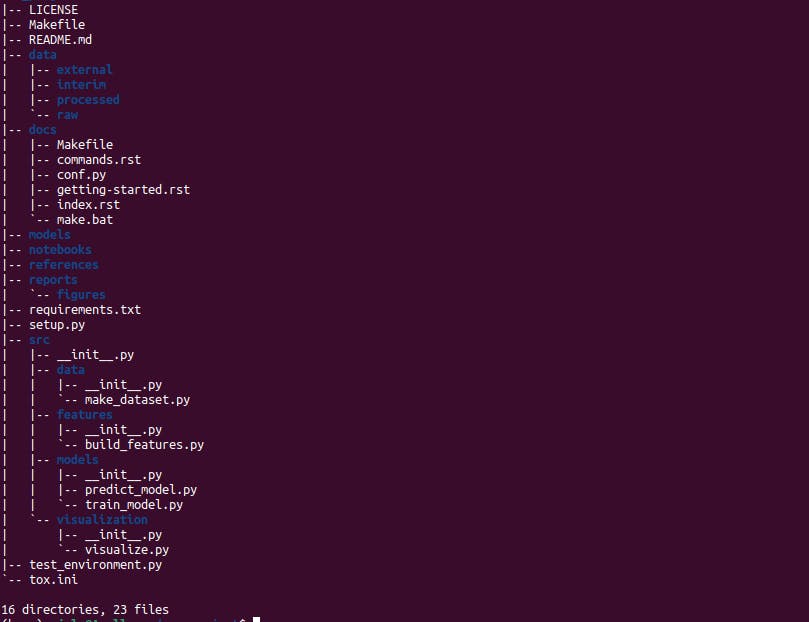 Based on the existing structure of the template of cookiecutter that we used, cookiecutter generated an exhaustive and very nice folder structure for us. This folder has 7 subfolders:
- data: This folder will contain all the data we will use for the project. It is further subdivided into four; external, interim, processed and raw which are similar to that produced by datasist but with an external folder, for datasets that might be from external sources and interim for datasets that may contain compilation and combination of all the different data files from different data sources before we then process them for our use
- docs: This folder will contain all the necessary documentation for our project. This will include the Makefile, commands on how to download data to our local environment from our s3 bucket, configurations for sphinx to automatically generate documentation for our project, documentation on getting_started, the index file which will contain the master file (document) generated by sphinx and makefile.bat on instructions to print to the terminal whatever information we want there.
- model: This folder will contain all our trained and serialised models, model predictions and model summaries.
- notebooks: This will host all the notebooks we will use in our project during experimentation.
- references: This will contain all the references, manuals, data dictionaries and other explanatory materials used during our project.
- reports: This will contain all the latex, markdowns, pdfs, charts, visualisations and dashboards that we may need to produce during the course of our project. It also contains the figure subfolder to contain the visualisations.
- src: This will contain all the source codes for our projects. This is similar to the src folder of datasist’s folder structure but in addition to models and feature (instead of preprocessing), it also contains data as a replacement for ingest to make, create or scrap for datasets and visualisations for creating visualisations.
The files created by the cookiecutter include;
- LICENCE: which contains the licencing for our project based on the option we selected.
- Makefile: to execute commands like ‘make data’ and ‘make train’.
- README.md: This will contain the description of our project that will be visible on the project’s profile and other important information we want to pass to the users of our project.
- requirements.txt: This will contain a list of all dependencies and packages our project utilises alongside their versions to promote reproducibility.
- setup.py: to package our project to make it pip installable.
- test_environmet.py: To test and ensure that the programming environment we are using / about to use is consistent with the one our project has been/is being written in.
- tox.ini – a tox file with necessary settings for running tox; you can read more about tox here
Remark
Cookiecutter when combined with the cookiecutter-data-science template seems like the best choice as it seamlessly creates a standard project folder for us with all the things we know we will need and others we aren’t even sure of yet. The only shortcoming of this folder is that it does not contain a test folder for us to keep all our test scripts, thus, we will need to do this ourselves which we can easily do using
mkdir tests
Conclusion
While a lot of thought does not go into creating a folder structure for our projects, but when properly done, it can save us a huge amount of time and even help us be more productive.
I hope you really enjoyed this article. If you did, please share with someone who might also benefit from the information shared in this article, you can also like, drop positive feedback and subscribe so you don’t miss out when I drop a new article. See you.

